Welcome to the world of Latch Hooking!
Latch Hook is a crafting term used to describe a process of attaching thread to a canvas – creating a rug, pillowface, or a hanging art piece. Typically the crafter follows a pattern with colored thread, giving the final product an image or graphic embedded in the work.
You will need 4 things to start Latch Hooking:
- Pattern
- Canvas
- Latch Hook Tool
- Pre-cut Thread
Almost all Latch Hook Kits include a Pattern, Canvas and Thread, but Latch Hook Tools are usually sold separately. A good Latch Hook Tool should last you years so you shouldn’t buy a new tool every time.
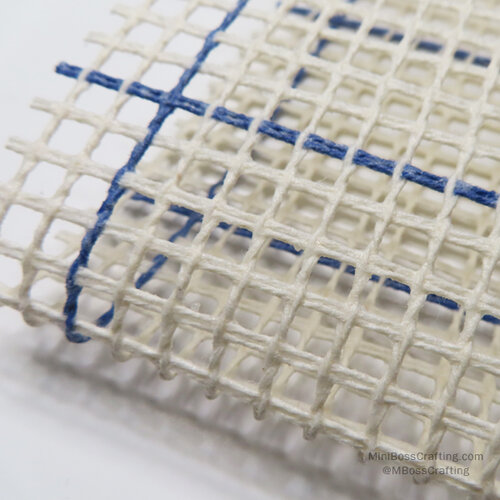
Finding the Correct Canvas Direction
Notice the threads that make up the canvas, there are the ‘twisted’ threads and the single (or double) ‘straight’ threads. The thread that is twisted should run vertical (up and down) and the straight thread should be horizontal (left to right). You should be working on the single straight thread, not the twisted part. I have made a few kits on the twisted threads, it can work out but it is best to work in the proper direction.
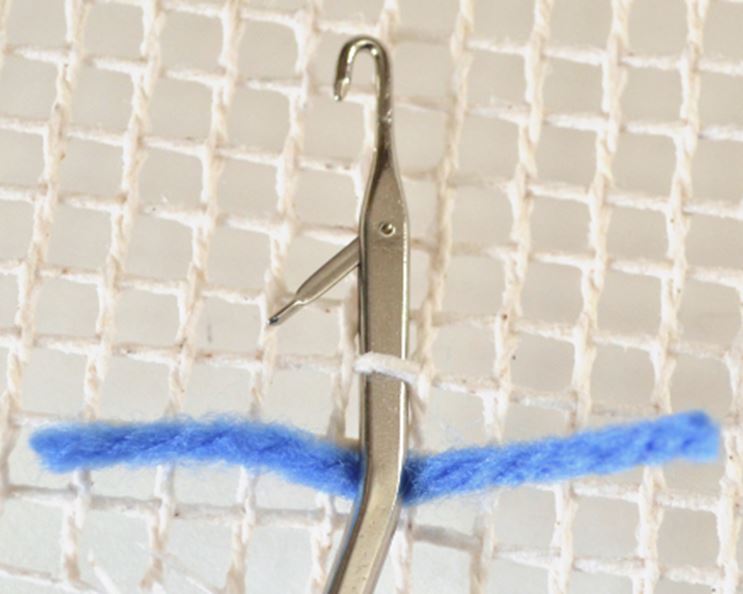
How to Tie Yarn onto the Canvas
Place the piece of yarn you want to tie on under the tool; try to put it evenly in the center so the ends will be close to even after tying. Push the tool through the canvas so there is one piece of the canvas above the tool like a little bridge. Make sure the tool is far enough past the canvas so the latch part that swings open and shut can move.
Put the two ends of the yarn up into the open latch. Start pulling down on the latch hook tool; when the tool reaches the canvas it was pushed under it will naturally close and you can pull the ends through the canvas and the looped yarn in one stroke.
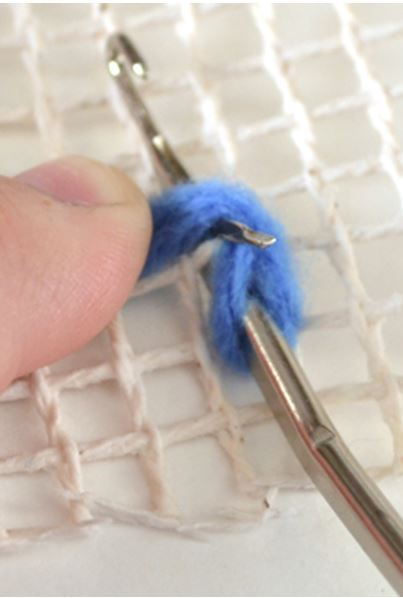
This will give you a knot on the bottom of the yarn, tight against the canvas. Pull on the two ends to tighten the knot and make the ends longer. Bear in mind if you want to machine wash your rug the yarn is only on there as tight as you’ve pulled it, so give it a good couple of tugs! If your yarn isn’t even you can use this opportunity to pull harder on one side to even them out.
Following the Pattern
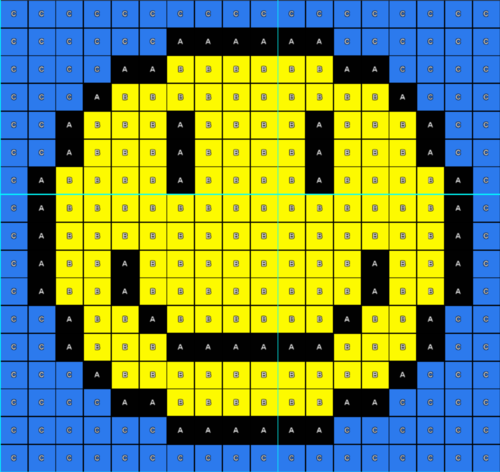
Before starting out take a moment to look at your pattern and the canvas. If you purchased a kit from us you will find we have tied on the first two strands on the bottom left side of the canvas and marked them off on the pattern. Notice the light blue lines on the canvas, those lines are also on the pattern. These blue lines are guidelines, they are placed every 10 squares both vertically and horizontally. Every square is one piece of yarn.
When I am working on a kit I review the pattern and grab the next 10 pieces of yarn I am going to use in the order they are going to get used. If I’m working on a small kit I might grab all the yarn thread I need for the entire row.
If you look at the Smile Emoji free pattern I have: Row 1 is 18 strands of C. Row 2 I would grab 6 Strands of C, 6 strands of A, and 6 more strands of C.
We strongly suggest working on your kit row by row instead of completing one color at a time. It can get quite difficult to tie in colors when yarn is already tied on the grid above where you are trying to work. Work your project from left to right, or right to left, but always start from the bottom and work up to the top.
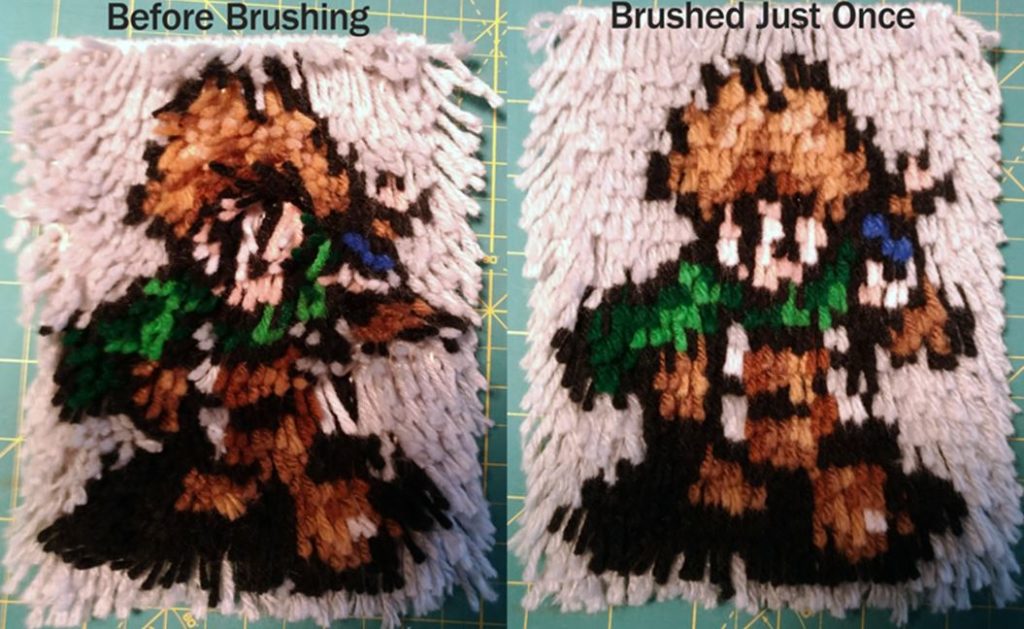
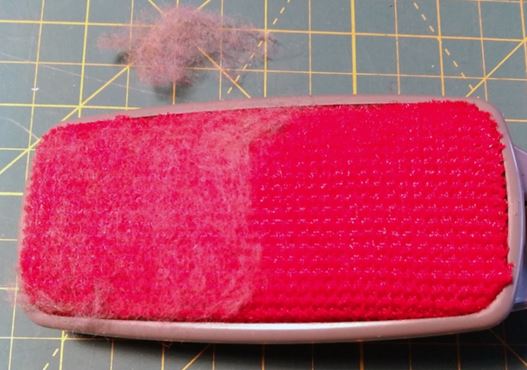
Making a Rug Look its Best
Most of our patterns have very fine details and to make sure things are in the right spot we spend some time brushing finished rugs. In a pinch your palm and fingertips will do but a lint brush is the best option. There will be some fuzz and little pills from working the yarn. Brush the yarn down, towards the bottom, following in the direction the yarn is pointing. Then brush the yarn on a 45 degree angle to the left and then to the right and then back down again. Repeat if you see any loose bits of fluff. Doing this will align the threads, brighten up your colors, get rid of fuzz, and really help the image pop!